Three.js DevTools MCP
Inspect and edit Three.js scenes, materials, shaders, lights in real time from any AI agent
Runs on your machine from its package; the steps are below.
What it does
- Reads
- Writes
- High impact
At most: creates or changes data: records, files, settings.
What it costs
FreeOdel charges nothing per call. The publisher may charge for its own service.
Runs locally over stdio
This server isn't hosted — your MCP client launches it from a package registry. Use one of the commands below, or drop the config into your client (e.g. Claude Desktop).
Run
npx -y threejs-devtools-mcp
MCP client config
{
  "mcpServers": {
    "three-js-devtools-mcp": {
      "command": "npx",
      "args": [
        "-y",
        "threejs-devtools-mcp"
      ]
    }
  }
}


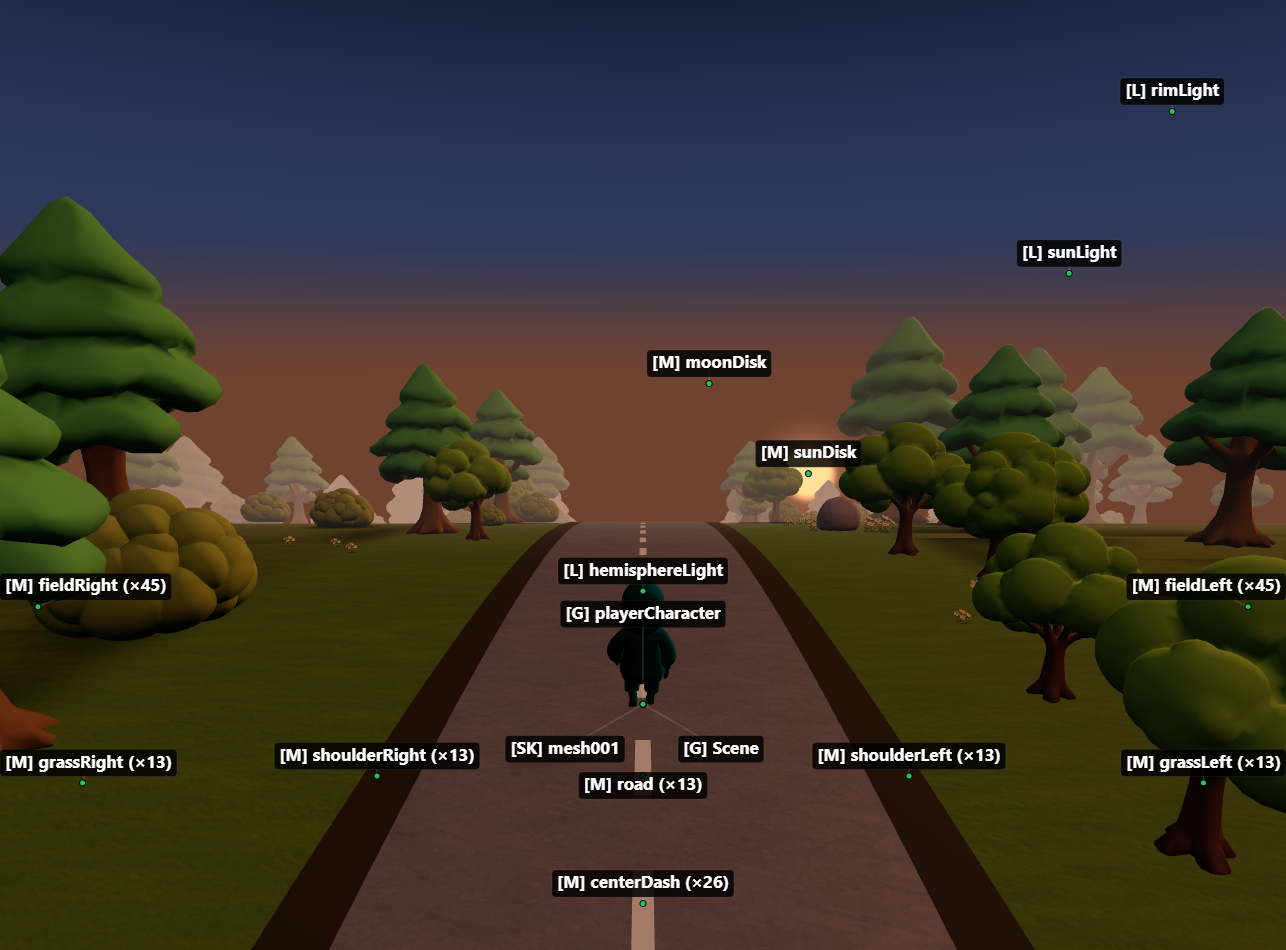
MCP server for inspecting and modifying Three.js scenes in real time — 59 tools for objects, materials, shaders, textures, animations, performance monitoring, memory diagnostics, and code generation.
Zero changes to your project. Works with vanilla Three.js, React Three Fiber, and any framework.
Setup
1. Add the MCP server
Claude Code
claude mcp add threejs-devtools-mcp -- npx threejs-devtools-mcp
Claude Desktop
Add to claude_desktop_config.json:
{
  "mcpServers": {
    "threejs-devtools-mcp": {
      "command": "npx",
      "args": ["-y", "threejs-devtools-mcp"]
    }
  }
}
Cursor
Add to .cursor/mcp.json in your project:
{
  "mcpServers": {
    "threejs-devtools-mcp": {
      "command": "npx",
      "args": ["-y", "threejs-devtools-mcp"]
    }
  }
}
Or use the HTTP transport — see Cursor setup guide.
Windsurf
Add to ~/.codeium/windsurf/mcp_config.json:
{
  "mcpServers": {
    "threejs-devtools-mcp": {
      "command": "npx",
      "args": ["-y", "threejs-devtools-mcp"]
    }
  }
}
VS Code (Copilot)
Add to .vscode/mcp.json:
{
  "servers": {
    "threejs-devtools-mcp": {
      "command": "npx",
      "args": ["-y", "threejs-devtools-mcp"]
    }
  }
}
OpenCode
Add to opencode.json in your project:
{
  "$schema": "https://opencode.ai/config.json",
  "mcp": {
    "threejs-devtools-mcp": {
      "type": "local",
      "command": ["npx", "-y", "threejs-devtools-mcp"],
      "enabled": true
    }
  }
}
2. Start your dev server and open the browser
Start your Three.js dev server as usual (npm run dev). The MCP server auto-detects the port from package.json and opens a browser at localhost:9222 with the devtools bridge injected.
Keep the browser tab open. The MCP server talks to your scene through a WebSocket bridge. Close the tab = tools stop working.
3. Ask the AI about your scene
"show me the scene tree"
"why is my model invisible?"
"make the car red"
"check for memory leaks"
"what's my FPS?"
"generate a React component from character.glb"
In-browser overlay
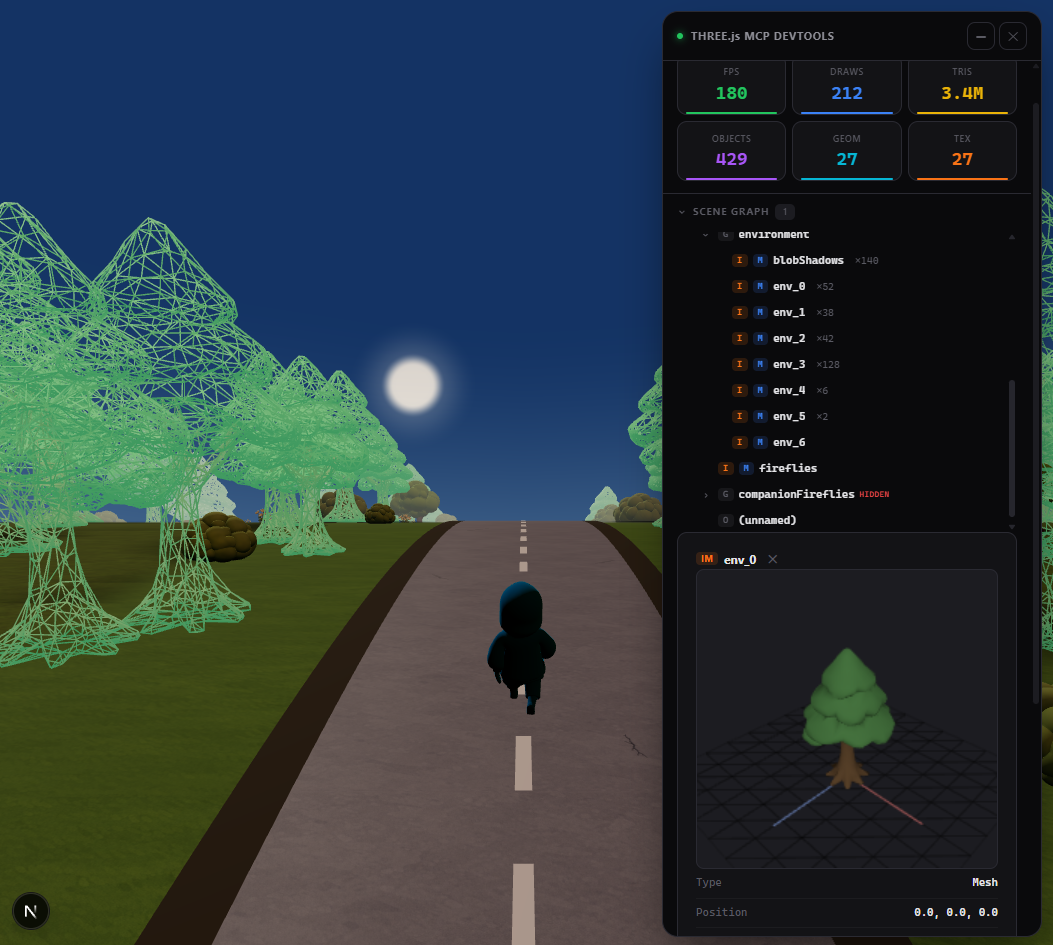
A built-in devtools panel with live performance stats, interactive scene graph, material editor, and 3D object preview. Activated automatically or via the toggle_overlay tool.
Tip: name your objects
Unnamed objects show as (unnamed) in the scene tree. Named objects are easier to find and modify:
// Three.js
mesh.name = "player";
// React Three Fiber
<mesh name="player" geometry={geometry} material={material} />
Documentation
- Tools reference — all 59 tools with parameters
- Advanced setup — animations, scene export, configuration, transports
- Cursor setup — step-by-step guide for Cursor
- Token-efficient workflow — best practices for saving context
License
MIT