
roadstyle
Styled, interactive road maps of any place (OpenStreetMap) or road file, with PNG previews.
Runs on your machine from its package; the steps are below.
What it does
- Reads
- Writes
- High impact
At most: creates or changes data: records, files, settings.
What it costs
FreeOdel charges nothing per call. The publisher may charge for its own service.
Runs locally over stdio
This server isn't hosted — your MCP client launches it from a package registry. Use one of the commands below, or drop the config into your client (e.g. Claude Desktop).
Run
uvx roadstyle-mcp
MCP client config
{
  "mcpServers": {
    "roadstyle": {
      "command": "uvx",
      "args": [
        "roadstyle-mcp"
      ]
    }
  }
}

roadstyle
Beautiful, interactive road maps from Python.
One offline HTML file with real road cartography, Google Street View and a JavaScript API.





Install · Quickstart · Gallery · AI agents · Documentation
Why roadstyle
- Real road cartography. Casing and fill, widths that change with zoom, street names, one-way arrows, tunnels drawn under and bridges over, and optional 3D bridge decks.
- One offline file. Map, data and styling in a single HTML page: open it without a server, email it, or put it on any website.
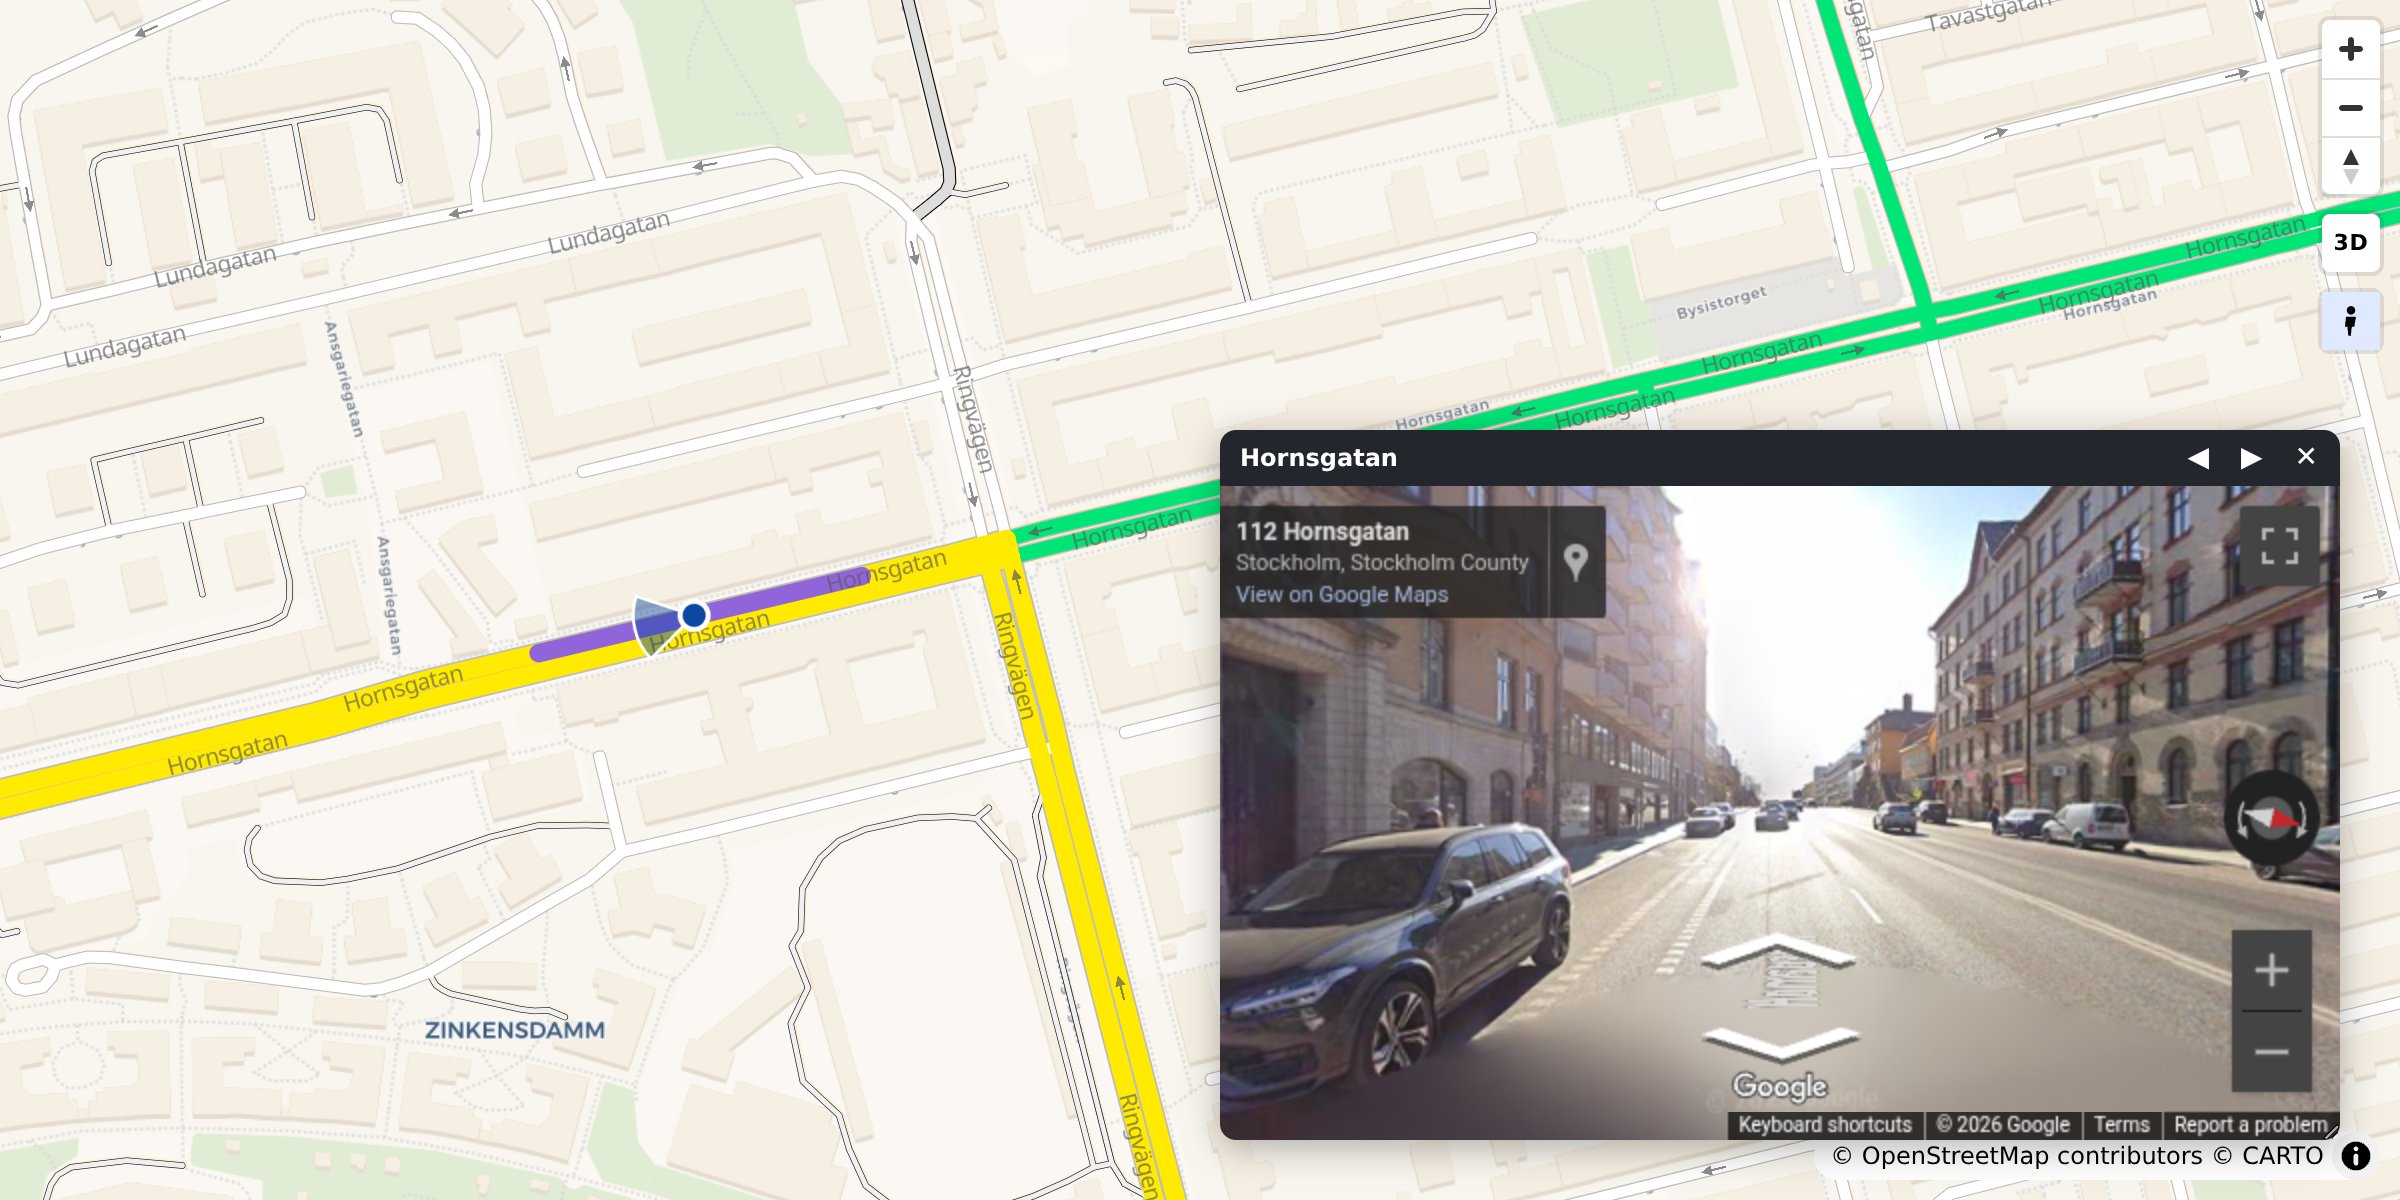
- Street View built in. Click any road to see it in Google Street View, facing the way it runs.
- Any road data. A GeoDataFrame, a file, DuckDB, Arrow, osmnx or duckOSM.
- Colour by your data. Speed, traffic or any column, with a legend and a menu of colourings.
- Scriptable. A
window.rs*JavaScript API and events for your own dashboard. - Ready for AI agents. An MCP server and an agent skill.
Install
pip install roadstyle              # core
pip install "roadstyle[all]"       # + studio, numeric ramps, vector tiles, lonboard, DuckDB, …
Python ≥ 3.10. Individual extras and the dev setup: Install.
Quickstart
From OpenStreetMap, no data needed. Any place, with osmnx (pip install osmnx):
import osmnx as ox
import roadstyle as rs

G = ox.graph_from_place("Tartu, Estonia", network_type="drive", simplify=False)
G = ox.simplify_graph(G, edge_attrs_differ=["bridge", "tunnel"])   # keep tunnels and bridges apart
rs.render_edges(ox.graph_to_gdfs(G, nodes=False)).save("tartu.html")
From your own data. Any file or GeoDataFrame with line geometry and a highway column:
import geopandas as gpd
import roadstyle as rs

edges = gpd.read_file("edges.gpkg")        # LineStrings + a `highway` column, any CRS
rs.render_edges(edges).save("map.html")    # open map.html: no server (Street View needs one)
More looks:
rs.render_edges(edges, basemap="dark_matter", view_3d=True)            # dark, 3D bridge decks
rs.render_edges(edges, palette="carto", basemap="positron")            # the classic OSM look
rs.render_edges(edges, color_by="aadt", cmap="viridis")                # colour by your data
rs.render_edges(edges, palette="mono", color_options={                 # several colourings,
    "Traffic": {"color_by": "aadt", "cmap": "viridis"},                #   switched in the browser
    "Speed":   {"color_by": "maxspeed_kmh", "cmap": "magma"}})
rs.render_edges(edges, tiles=True)                                     # 100k+ edges
rs.render_dashboard(edges).save("dashboard.html")                      # map + query sidebar
rs.render_street_view(edges).save("street_view.html")                  # map and Street View side by side
No Python? roadstyle edges.gpkg -o map.html --basemap dark_matter, or click through it in the
workbench: pip install "roadstyle[studio]" && roadstyle studio.
Gallery
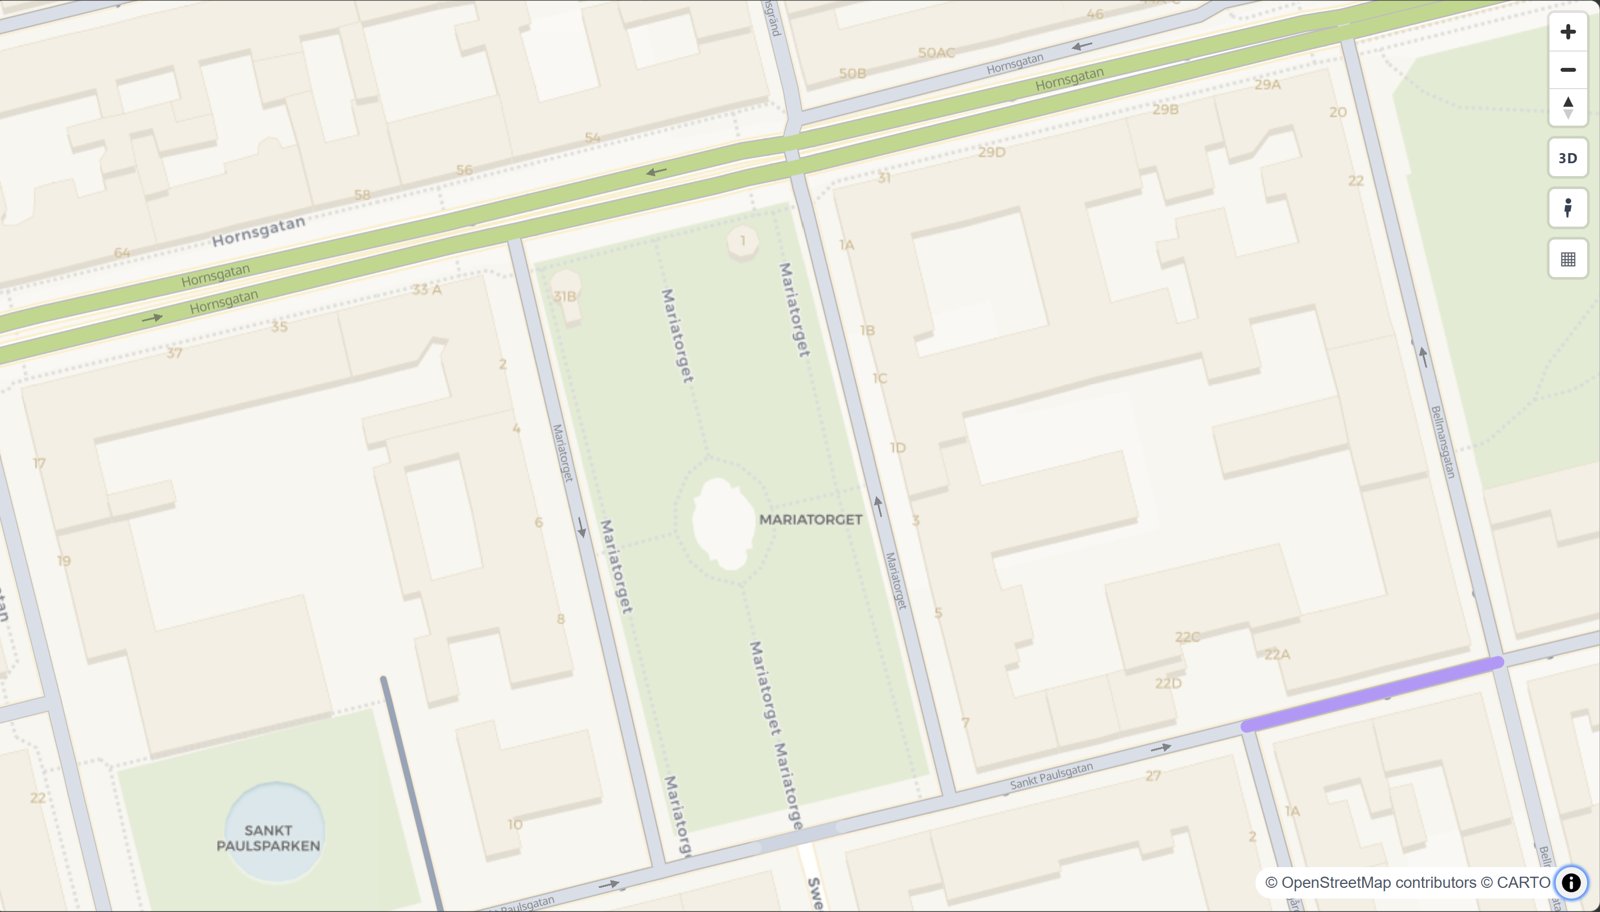 The road map look rs.render_edges(edges) | 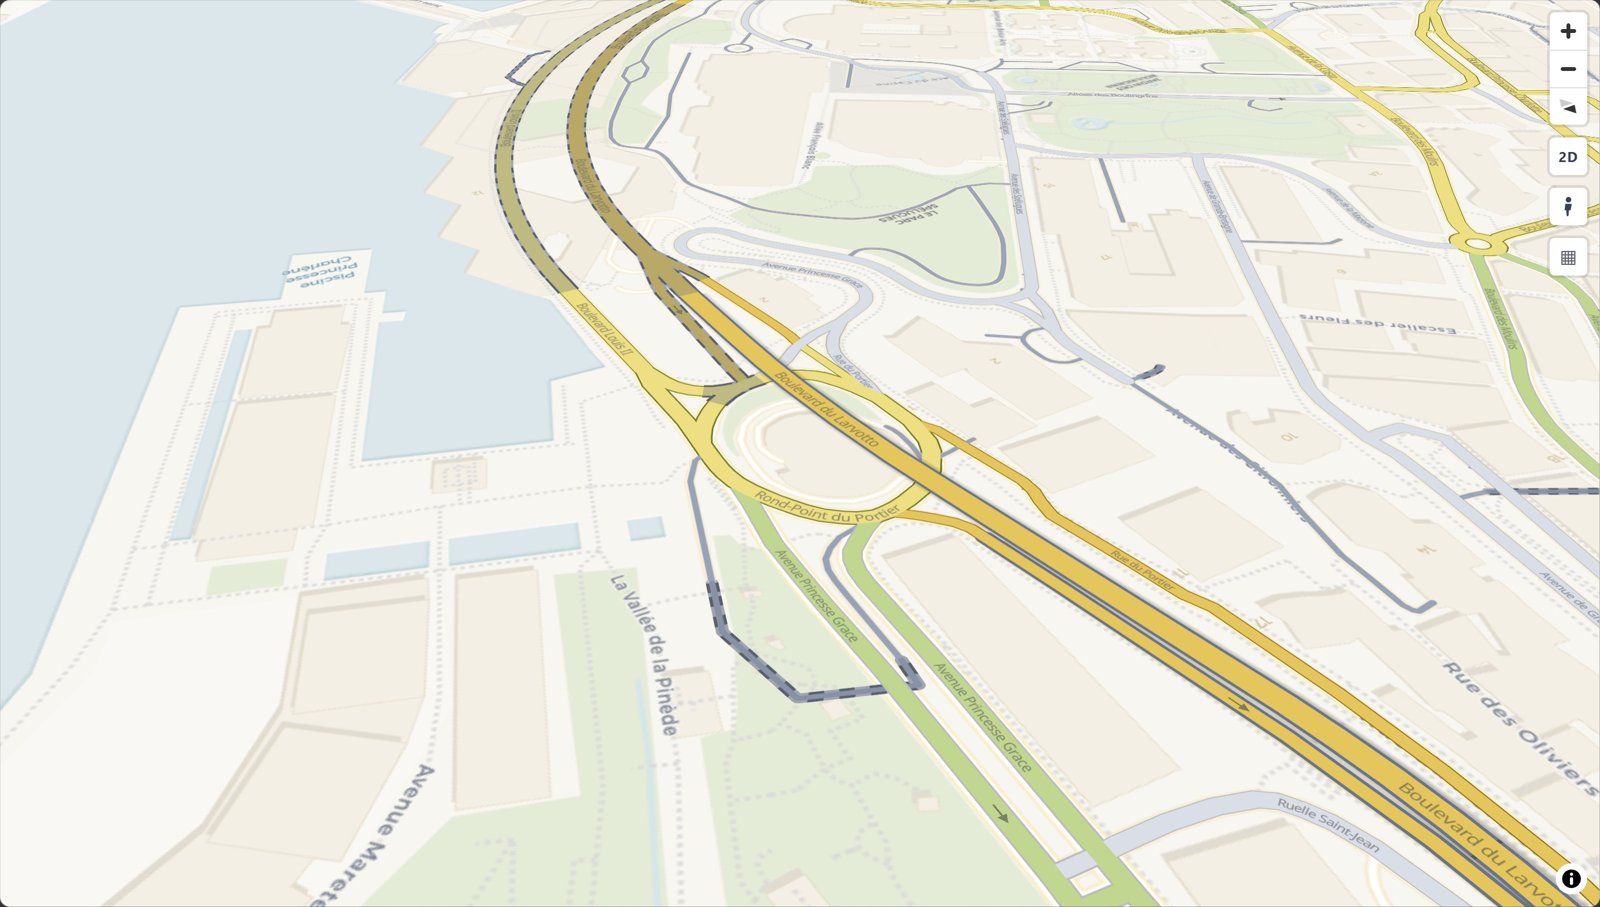 Bridges and tunnels rs.render_edges(edges) | 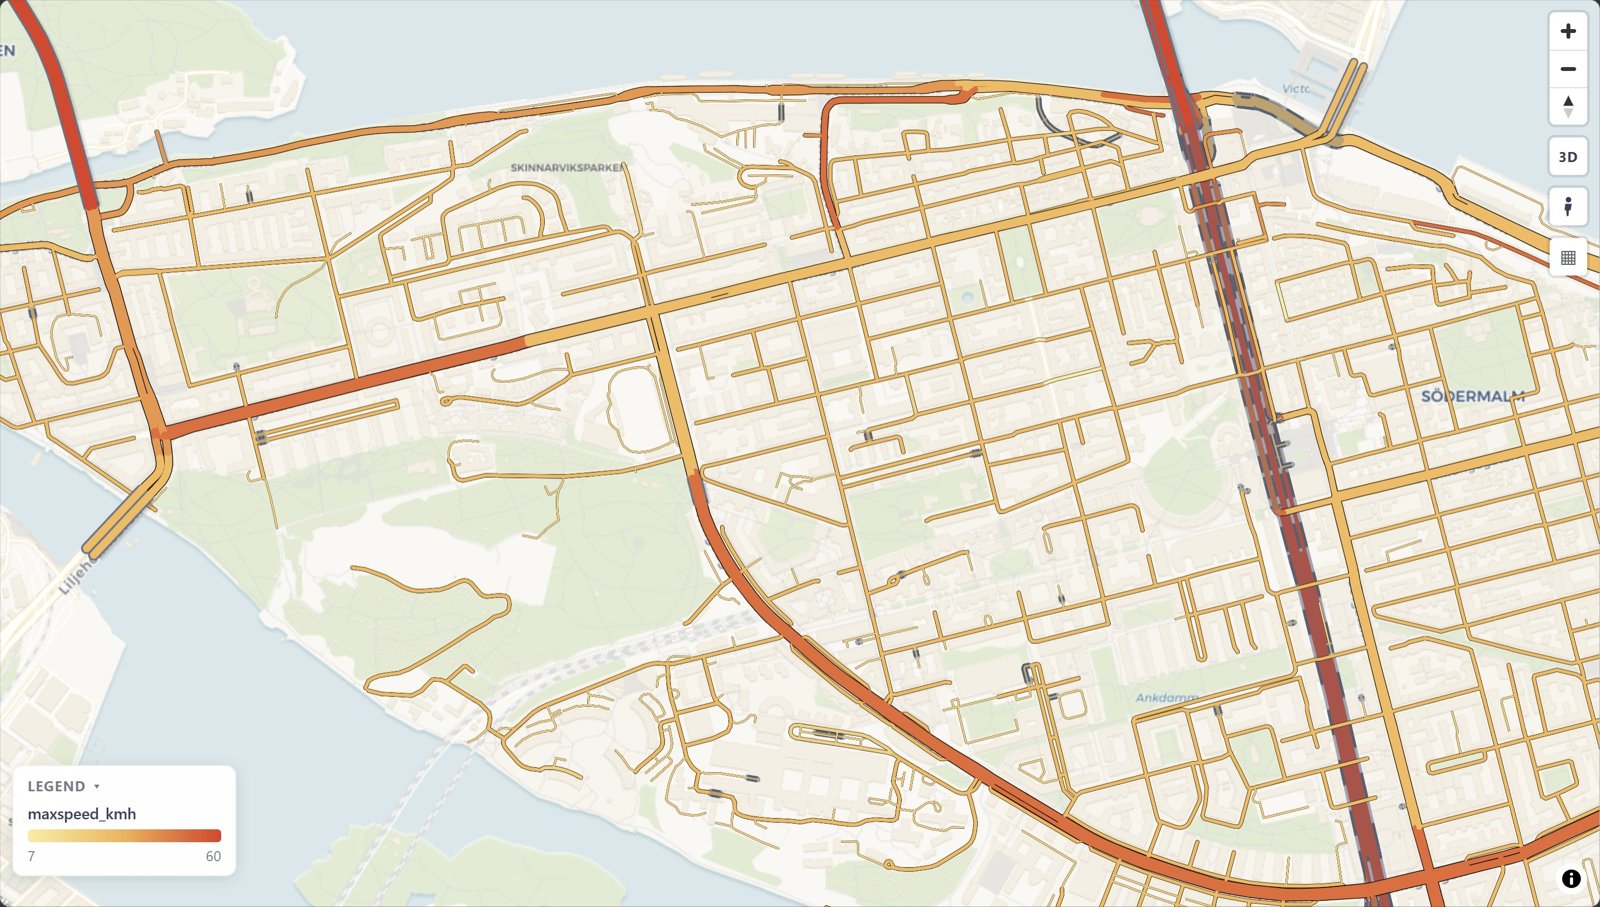 Colour by your data color_by="maxspeed_kmh" |
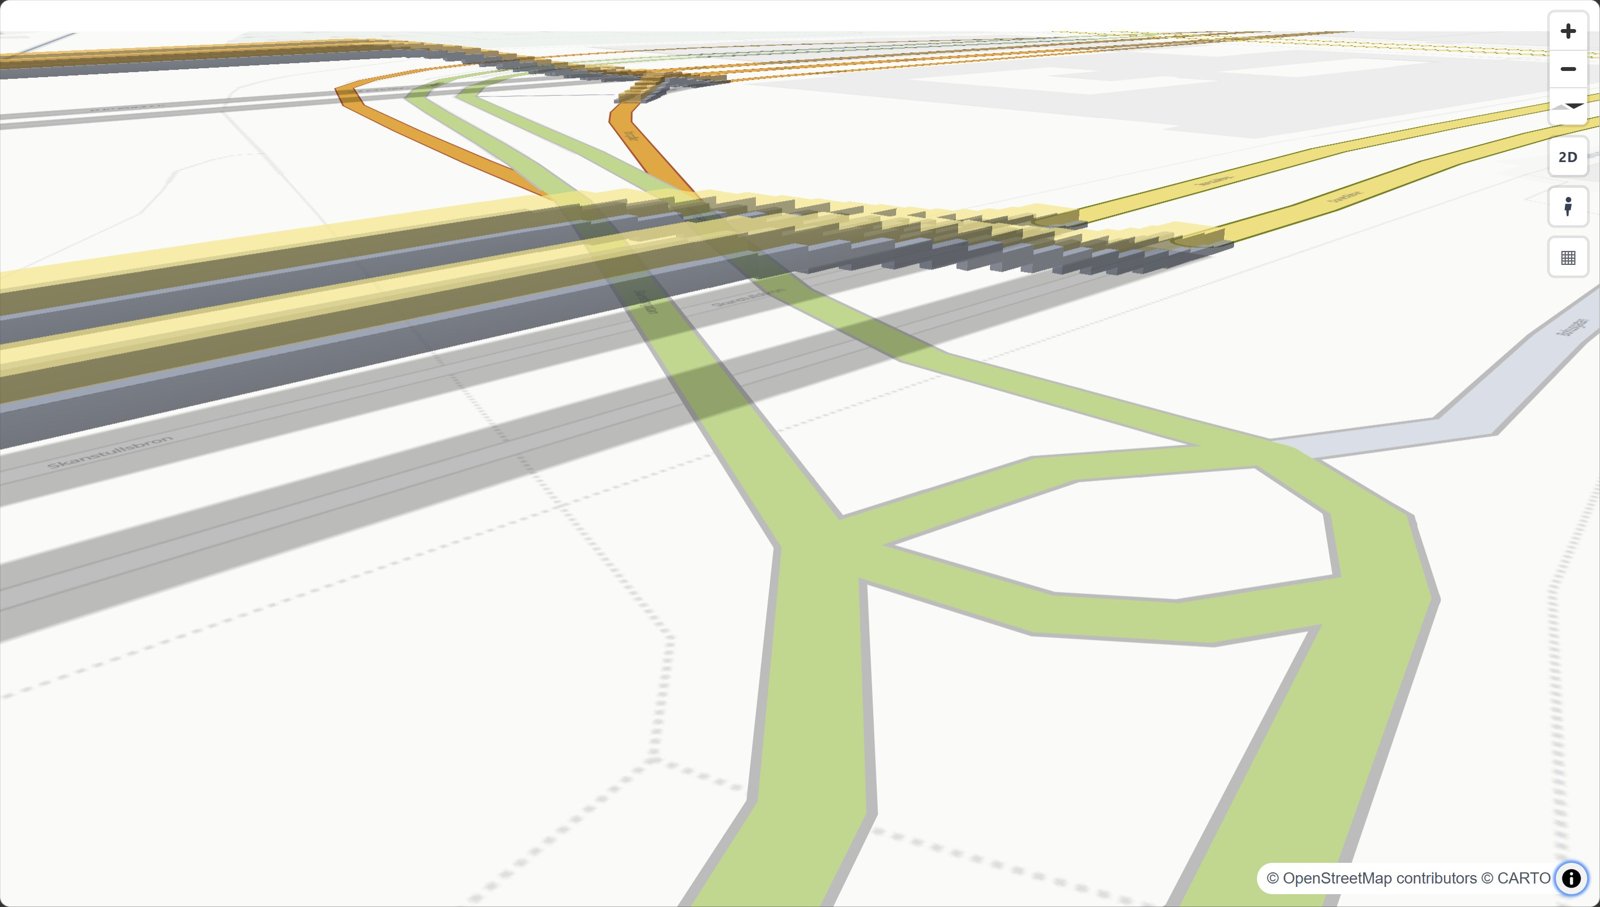 3D bridges view_3d=True | 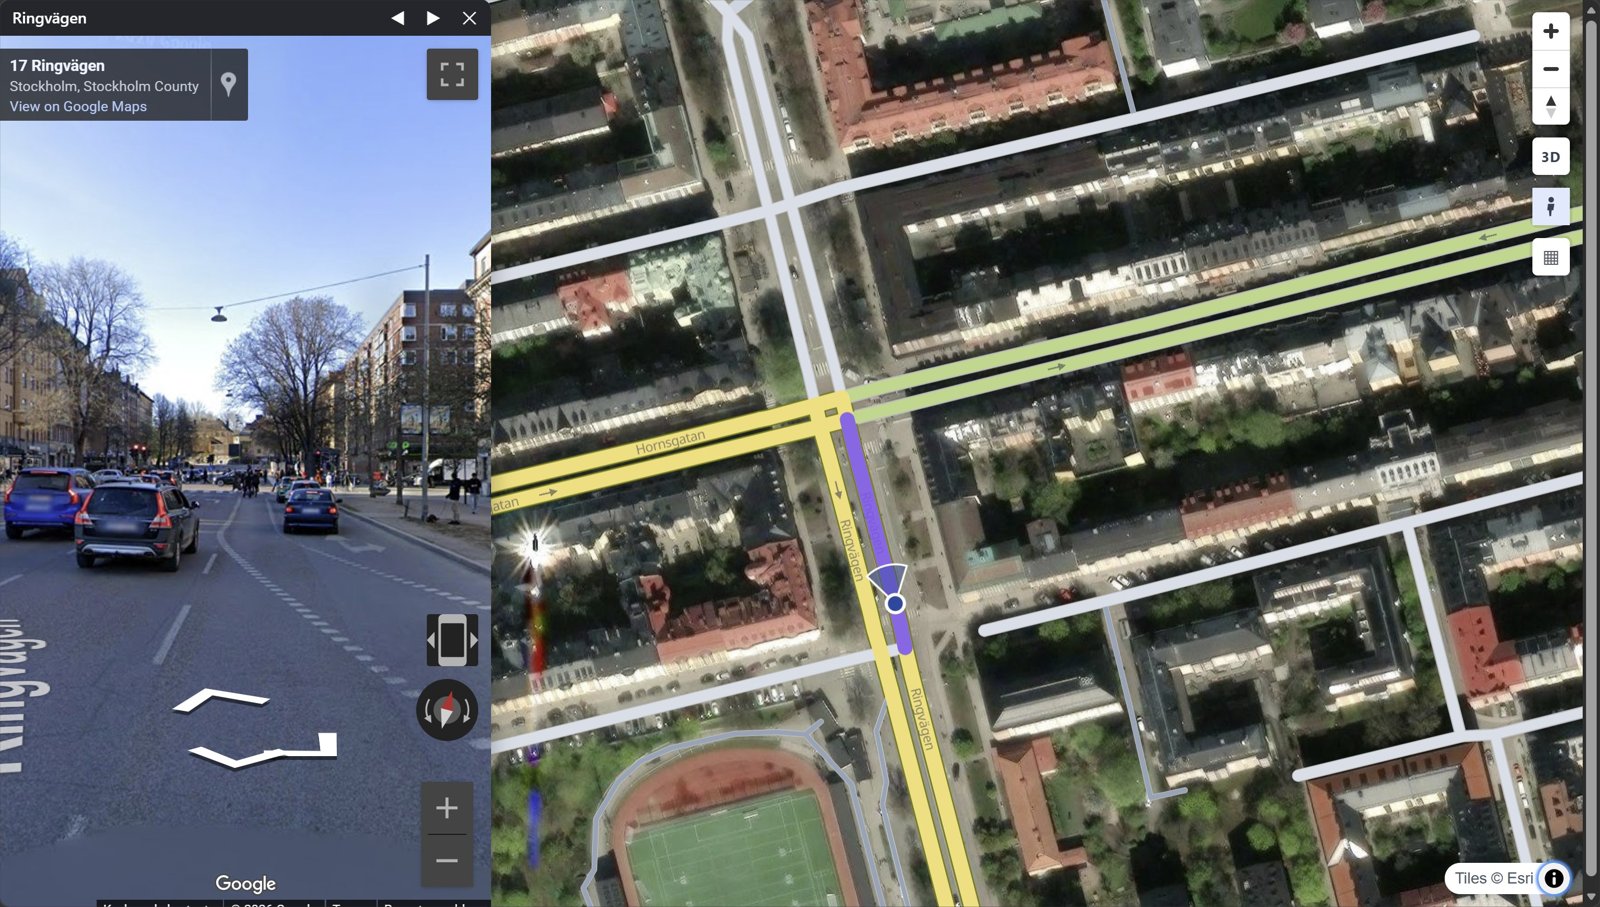 Street View click a road | 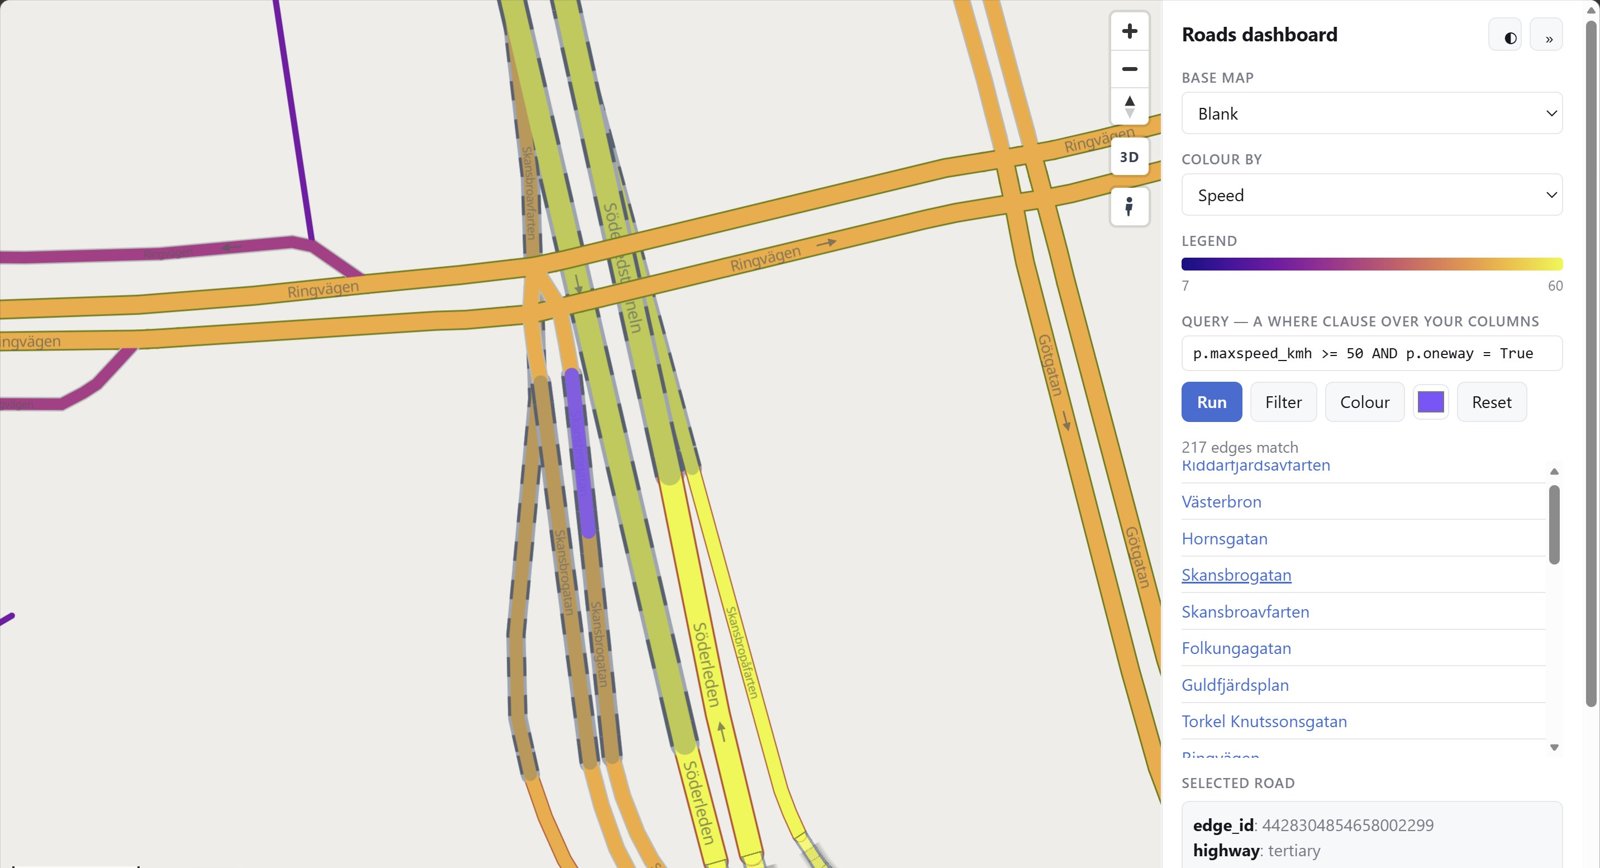 Dashboard rs.render_dashboard(edges) |
Every look with its code: the gallery.
What goes in
Only geometry and highway are required. Other columns switch features on:
| Column | Powers |
|---|---|
geometry (LineString, any CRS) | the edges. Each edge is directed: a two-way road is two edges with reversed geometry |
highway (OSM class) | colour, width, casing, draw order |
name | street labels, popup title |
oneway | direction arrows |
bridge / tunnel / layer | grade separation: tunnels below, bridges on decks above |
edge_id | popups; 64-bit ids stay exact |
| anything else | shown in the popup, queryable from JavaScript |
duckOSM (duckosm export-gis) exports exactly this, and
osmnx edges work as they are: rs.render_edges(ox.graph_to_gdfs(G, nodes=False)).
Drive it from JavaScript
The saved page exposes window.rs* functions and rs:* events:
const ids = rsQuery(p => p.maxspeed_kmh > 30); // feature ids whose properties match
rsColor(ids, "#ff00aa");  rsFocus(ids);       // paint them, fit the camera
document.addEventListener("rs:select", e => console.log(e.detail.properties));
Every function and event: JavaScript API.
For AI agents
MCP server. Lets any MCP-capable AI app (Claude Code, Claude Desktop, Cursor, …) draw road maps
without writing code: render_place("Tartu, Estonia"), render_file("roads.gpkg") and snapshot.
Each saves an HTML map and returns its path plus a PNG preview the agent can look at.
claude mcp add roadstyle -- uvx roadstyle-mcp
Claude Desktop, and where the maps go
In claude_desktop_config.json:
{"mcpServers": {"roadstyle": {"command": "uvx", "args": ["roadstyle-mcp"]}}}
Maps are saved in ~/roadstyle-maps/. The PNG preview needs Chromium, once:
uvx --from roadstyle-mcp playwright install chromium.
Claude Code plugin. The MCP server and the skill below in one install:
/plugin marketplace add Khoshkhah/roadstyle
/plugin install roadstyle@roadstyle
For agents that write code:
skills/roadstyle/SKILL.md: a skill for agents that use roadstyle (the one call, the data contract, the JS API, the traps). Install it for Claude Code:bashmkdir -p ~/.claude/skills/roadstyle && curl -fsSL -o ~/.claude/skills/roadstyle/SKILL.md \ https://raw.githubusercontent.com/Khoshkhah/roadstyle/main/skills/roadstyle/SKILL.mdAGENTS.md: for agents working on this repo.llms.txt: the docs site as a link list for LLMs.
API keys
Both keys are optional. roadstyle works without them, just with less.
- CARTO, for the default base map. Without a key its tiles are stamped API KEY REQUIRED;
set
CARTO_API_KEY, or use a keyless base map (esri_street,esri_dark_gray,osm,blank). - Google Maps, for Street View. Street View works with no key. A key adds a Linked mode: a real panorama, with the map marker walking and turning with you.
Setting up the CARTO key
The default base map (voyager) and positron and dark_matter come
from CARTO. Without a key, their tiles are stamped API KEY REQUIRED. Get a free key at
carto.com/basemaps/apikey, then use any one of these:
export CARTO_API_KEY="…" # environment variable
{ "config": { "api_keys": { "carto": "…" } } }
Save that JSON as ~/.config/roadstyle/roadstyle.json, or as roadstyle.json in the folder you run
from. In Python you can pass rs.render_edges(edges, api_key="…") instead. With no key at all, use
a keyless base map: esri_street, esri_dark_gray, osm or blank.
Setting up the Google Maps key
Street View works with no key: the keyless Google embed. With a Google Maps JavaScript API key, the Street View panel and window get a Linked / Classic switch. Linked is a real panorama: the map marker walks and turns with you, and only Google's own street photos are shown. Classic is the keyless embed. To get a key:
- In the Google Cloud console, create a project and enable Maps JavaScript API (Google asks for a billing account on the project).
- Under APIs & Services > Credentials, create an API key.
- Restrict it: Application restrictions = Websites, listing your site's addresses
(e.g.
https://example.com/*); API restrictions = Maps JavaScript API only.
Then pass it in:
rs.render_edges(edges, street_view_key="AIza…")         # the floating Street View window
rs.render_street_view(edges, street_view_key="AIza…")   # the side-by-side page
The key is written into the page, as every browser key is, so the site restriction in step 3 is
what protects it. It also means Linked works only on the addresses you listed: to try it on
localhost, add http://localhost:*/* to the list. Keep the key out of git, for example in an
environment variable.
More: settings & base maps · Google Street View.
Documentation
khoshkhah.github.io/roadstyle, with live maps on every page.
| Where | What you find |
|---|---|
| Get started | install, a first map, what your data needs |
| Guides | style the roads · colour by your data · your own layers · Google Street View · big networks · dashboards & JavaScript · on a website |
| Gallery | a picture and one line of code per look |
| Reference | every parameter · JavaScript API · settings & base maps · command line |
| Changelog | what changed in each release |
Built on
- MapLibre GL JS (BSD-3-Clause) draws every web map: roadstyle writes its style and data, and a copy of MapLibre is inlined in each saved page so it opens offline.
- OpenStreetMap data (© OpenStreetMap contributors, ODbL) and the openstreetmap-carto style, whose road classes, colours and widths roadstyle follows.
- HiGHS, through SciPy, solves which road is drawn on top.
- GeoPandas and Shapely for the geometry; lonboard (deck.gl) and folium for the notebook back-ends.
License
MIT. Base-map tiles come from third-party services (CARTO, OSM, Esri) with their own attribution and terms.


